Craig Lang's Art (CGA)
Tuesday, 26 April 2016
Hufflepuff Common Room: Added features
My scene is now taking shape. The textures are working well within the scene and the lighting and sound effects help create the warm, welcoming atmosphere I wanted.
It is now time to add the fine details. I adjusted some of my alpha textures which I previously created using an alpha filter in photoshop and saving out as a taga file format. I also added books to the bookcases by creating a cube in maya and adding extrusions. I also beveled the edges to help add shape and curvature to the spine. I then created multiple textures to help vary each books design.
After placing the books and reapplying the alphas I felt something was missing. The room seemed too empty and didn't quite feel part of the wizarding world. I therefore created additional props for the scene. These were a cauldron, a broomstick, a wooden spoon and a potion bottle. Besides the potion bottle, which needed a glass texture applied I could reuse materials such as the bronxe flower pots and wooden texture for the props.
There was already character to some of the bookshelves and I wanted to add to it even more. I therefore created an alpha plane of a spillage. I then split the potion bottle in half and extruding certain edges. By doing this I created the look of a broken bookcase which smashed and leaked potions onto the floor.
I added particle effects just like I did with the fire to the spilled potions and cauldrons to add more magic. I also added a bubble sound effect I downloaded to help bring the magic to life.
Sunday, 24 April 2016
Hufflepuff Common Room: Scripts and VFX
I needed to create scripts for my scene. The reason being is that I wanted to create a introduction cutscene which not only pans the camera around the room but also switches between cameras. I used a script I previously created using arrays for this. However tweaking was needed. Despite the tweaking to the original script there was a bug. Although the script work it wouldn't activate for some of the cameras causing them to freeze in position. I therefore created a debug script and attached them to the cameras which enabled and disabled the original script. This fixed the error.
I also used the same fire sprite from a previous tutorial and project for my fireplace. I adjusted the particle settings to create a realistic fire.
I downloaded music from both the film and games of the Harry Potter franchise. I used them for the cutscene and general background music. I also downloaded birdsong and fire sound effects to help create an atmosphere within the scene.
Monday, 18 April 2016
Hufflepuff Common Room: Unity
I imported my scene into Unity and came across a few issues. I noticed the scale was off and needed to be adjusted back in Maya. Once the adjustments were made I re-imported the scene. The second issue I came across was the amount of materials imported. I ended up deleting all materials from the project and created them from scratch instead. This helped me manage my project better. As I was importing my texture maps into Unity I noticed a third issue. Because some of the objects had multiple textures attached it would be hard to add them in Unity. I therefore had to separate and extract objects back in Maya such as the walls, floors and doors and reimport them. By having them as separate objects it made it quick and easy to apply the texture maps correctly.
I used the sun shaft and bloom camera effects to create god rays in my scene. This also helped create a warm glow which was vital for the scene.
Thursday, 14 April 2016
Hufflepuff Common Room: Comfy furniture
I was taught how to make my furniture look more cozy and textured using fiber mesh in Zbrush. By using the fiber mesh tool and adjusting the values I could create the effect of upholstery. I then exported the fiber mesh and backed normal, cavity and vertex colour maps using xnormals. I then used Quixel to add the textures. I tried to add the additional fern pattern as seen in my reference, but I struggled to recreate the look. I therefore left the textures a plain yellow.
Wednesday, 6 April 2016
Hufflepuff Common Room: Continuously Tweaking
I've continued using Quixel to texture my models. However I've continued to face issues with my UV's while doing so. For example my doors, windows, chairs and flower pots all had wasted space within their UV's. Not only that, but my floor and wall textures also had issues. The textures were not seamless to begin with and there was stretching of UV's around the entrance.
All of these issues had to be fixed. This required a lot of back and forth between softwares in order to deliver models to a respectable standard. Although tedious it was necessary. The UV's for my walls and floors needed to be evened out using the scaling tool in the UV editor. This helped smooth out the UV's and fixed most issues. However extra edge loops needed to be added around the entrance to mend some of the more tricky stretched textures.
I also needed to attach my windows to the walls. This is because I needed light to shine through them using the skybox in unity. I extruded out the faces of the window. I then merged the edges to four points to form a single polygon. Once I merged the wall and windows together I then connected the verts together and the windows where finally attached. Then I could delete the inner faces and have light shine through them.
Wednesday, 23 March 2016
Hufflepuff Common Room: UV Unwrap and textures
UV Unwrap and Textures
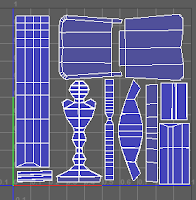
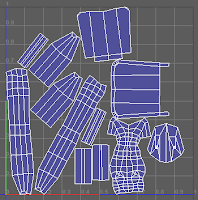
I finished UV unwarpping all objects within this project. I used a variety of techniques and tools to do this. The most popular technique I used was cutting and sewing UV edges and unfolding the UV's using the unfold tool. I then used the scale tool to straighten out the edges in the UV editor window.
However for some of the objects such as the wooden chairs this technique wasn't the best. I therefore needed to use the automatic unwrap on certain faces and sew UVs together in order to create cleaner unwraps.


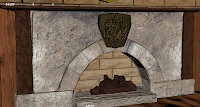
After unwrapping my fireplace I baked the normals from my zbrush model to my low poly model. I then created a colour map. I now had 3 separate maps, which I loaded into quixel to add the final textures.

I'm continuing to add textures to the rest of the environment.
Wednesday, 2 March 2016
Subscribe to:
Comments (Atom)


