Wednesday, 9 December 2015

Game arts: Winter Submission part 3


09/12/2015


Zbrush, Texturing, Xnormals & Unreal


I started to add detail in zbrush to my model. I first subdivided the model 5 times in order to generate more polys. The higher the polys the more room for smoother texturing.

 I enabled the morph tool when adding textured detail such as leather to my model. With the morph tool I am able to die down the strength of the initial added brush strokes, without effecting the rest of the model and the detail. I used different alpha images for my leather and fabric textures on the standard brush when adding detail.


I then added Stitching to my model using the StichBasic brush Tool.


Once I added all the detail I then exported the model ready to bake.

I opened xnormals and loaded the low and high poly models to the xnormals.


I then adjusted the settings and baked.


I then added the normals to the low poly model in maya. I had to adjust the bump depth in order to make sure they weren't too strong.


I then created my colour textures in photoshop.


I added the colour texture to the same material as my bump maps.


Once I was satisfied with my final model. I then exported the model and textures into Unreal4.
I also created a quick comic book to add to the environment in order to make my environment look more interesting.


After tweaking with the lighting and adding some cubes I've created my final Unreal scene


Friday, 23 October 2015

Game Art: Winter Submission Part 2

23/10/2015

Bag Prop High Poly (Maya)


I continued where I left off by creating a cube and rescaling it into a belt. I then duplicated the object to create two belts. Using the measurements I gathered for my research I adjusted the belts to their correct length.


I then used the bend tool to add curvature to the belts. I then added belt buckles and adjusted the verts to show the belt is woven between them. 


I then moved onto the zip. I used the quad draw tool to outline the handle. Adding edgeloops and adjusting the verts I deleted faces to create the holes. I then extruded the edges down to add depth to the holes. I also extruded the first top faces around the edge of the handle to add more depth to the zip. I then mirrored and attached the bottom of the handle.


For the zip base I created a cube and scaled the edges to match the image. I then selected and deleted faces when needed. I looked at my actual bag for reference. I then extruded the centre top faces to create the hook. 


I scaled down the zip and adding extrusions to the top of the bag I lined up the zip accordingly. After some tweaks to the model here is my final high poly maya model ready for UV unwrapping.


Thursday, 15 October 2015

Game Art: Winter Submission part 1

15/10/2015

Bag Prop


For my winter submission in game art I decided to model my Spider-Man bag, as I always carry it around with me, so I'll always have good reference.


I started off by taking photos of my bag from different angles to for reference. I also too measurements of my bag to help understand the proportions better. I then identified each material and colour on my bag and googled referenced them. 


I took my photo references and I lined them up in photoshop in order for the proportions to be correct and ready to import into maya.


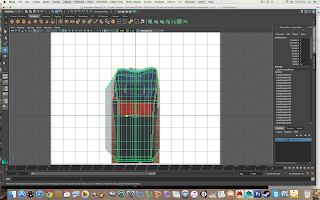
I opened maya and set up my scene. I then started modelling the front of the bag using the quad draw tool. 


I then continued to model the side and back of the bag.


Here it is in smooth mode.


Thursday, 8 October 2015

Game Art: Introduction to Zbush

08/10/2015

Over the last couple of weeks I have been studying the basics within the Zbrush program.


First lesson I experimented with the basic sculpting tools and fallout brushes.


Second lesson I practiced how to use Zshperes to create models from scratch and then add a poly wireframe mesh.


In my third lesson I learned how to use subtools. By using subtools I am able to add additional features to a model e.g clothes by extracting new layers under the highlighted areas created by the mask tool.


Monday, 5 October 2015

Game Art: Knife Tutorial

05/10/2015


For the past 2 weeks I've been following a written tutorial created by my lecturer on how to create a knife prop in Maya 2016.

I first used the quick draw tool to outline the handle and buttons in the top view port.


I then beveled the edges around the blade and added screw heads. I used normal and smoothed mode to adjust the vertices and edge flow.


I then moved onto the blade by using the quick draw tool to outline the blade.


I then I started adding additional features to the blade.


2nd Year

2nd YEAR

Tuesday, 8 September 2015

Summer Project

08/09/2015

Cyborg


This summer I was given the project to design and create a cyborg character for a sci-fi video game. After reading the brief I decided to do some research and gather images for a moodboard.


I then created silhouettes designs for a cyborg character. I took two pose images from my research one male and one female. I coloured over them with black and then used them as templates. I erase and added paint to create different designs.  I then chose the best three designs and added more detail. 


I decided to develop the female design as I feel I haven't done enough female characters and deigns for my previous projects. I came up with the idea of a cyborg medic and started designing. However I struggled developing the design in photoshop, so I redrew the design in my sketchbook. From their I created another moodboard with my hand drawn pencil design and images of female cyborgs.  
I then started modelling my character within maya. I used a female model images from 3d.sk as I wanted to have realistic proportions. I know my pencil drawing is not anatomically accurate and would cause me problems if I used it as a modelling template.


I started modelling the feet and legs from a cube adding edge loops extrusions.


I then started to model the torso.


Then the arms and breasts.


I then followed a tutorial on youtube in modelling a head. I decided to use the images of celebrity Jennifer Lawrence, as I felt she most suited the character design I was trying to create. I started modelling the eyes, nose and mouth. 


I then expanded out to outline the jaw and cheek line.


I continued to extrude around the side of the head completing the jaw line, cheek and ear.


I then extruded out from the forehead and around the cranium to complete the head.


I then exported the head as an obj file and imported it with the body. I also used the extra edge loops from connecting the head to the body to redo the breasts. The breasts are now in quads.


I then modelled the hands from a cube. I duplicated the finger three times and rescaled them to match each finger length before re-attaching them.


I then exported the hands and imported them into the body scene. After attaching the hands this is the low poly model of my basic female character.


I then added the wings.


I added lights to the scene and rendered the low poly model. I then used the renders to create my pose sheet design of my character in photoshop.