Friday, 23 October 2015

Game Art: Winter Submission Part 2

23/10/2015

Bag Prop High Poly (Maya)


I continued where I left off by creating a cube and rescaling it into a belt. I then duplicated the object to create two belts. Using the measurements I gathered for my research I adjusted the belts to their correct length.


I then used the bend tool to add curvature to the belts. I then added belt buckles and adjusted the verts to show the belt is woven between them. 


I then moved onto the zip. I used the quad draw tool to outline the handle. Adding edgeloops and adjusting the verts I deleted faces to create the holes. I then extruded the edges down to add depth to the holes. I also extruded the first top faces around the edge of the handle to add more depth to the zip. I then mirrored and attached the bottom of the handle.


For the zip base I created a cube and scaled the edges to match the image. I then selected and deleted faces when needed. I looked at my actual bag for reference. I then extruded the centre top faces to create the hook. 


I scaled down the zip and adding extrusions to the top of the bag I lined up the zip accordingly. After some tweaks to the model here is my final high poly maya model ready for UV unwrapping.


Thursday, 15 October 2015

Game Art: Winter Submission part 1

15/10/2015

Bag Prop


For my winter submission in game art I decided to model my Spider-Man bag, as I always carry it around with me, so I'll always have good reference.


I started off by taking photos of my bag from different angles to for reference. I also too measurements of my bag to help understand the proportions better. I then identified each material and colour on my bag and googled referenced them. 


I took my photo references and I lined them up in photoshop in order for the proportions to be correct and ready to import into maya.


I opened maya and set up my scene. I then started modelling the front of the bag using the quad draw tool. 


I then continued to model the side and back of the bag.


Here it is in smooth mode.


Thursday, 8 October 2015

Game Art: Introduction to Zbush

08/10/2015

Over the last couple of weeks I have been studying the basics within the Zbrush program.


First lesson I experimented with the basic sculpting tools and fallout brushes.


Second lesson I practiced how to use Zshperes to create models from scratch and then add a poly wireframe mesh.


In my third lesson I learned how to use subtools. By using subtools I am able to add additional features to a model e.g clothes by extracting new layers under the highlighted areas created by the mask tool.


Monday, 5 October 2015

Game Art: Knife Tutorial

05/10/2015


For the past 2 weeks I've been following a written tutorial created by my lecturer on how to create a knife prop in Maya 2016.

I first used the quick draw tool to outline the handle and buttons in the top view port.


I then beveled the edges around the blade and added screw heads. I used normal and smoothed mode to adjust the vertices and edge flow.


I then moved onto the blade by using the quick draw tool to outline the blade.


I then I started adding additional features to the blade.


2nd Year

2nd YEAR

Tuesday, 8 September 2015

Summer Project

08/09/2015

Cyborg


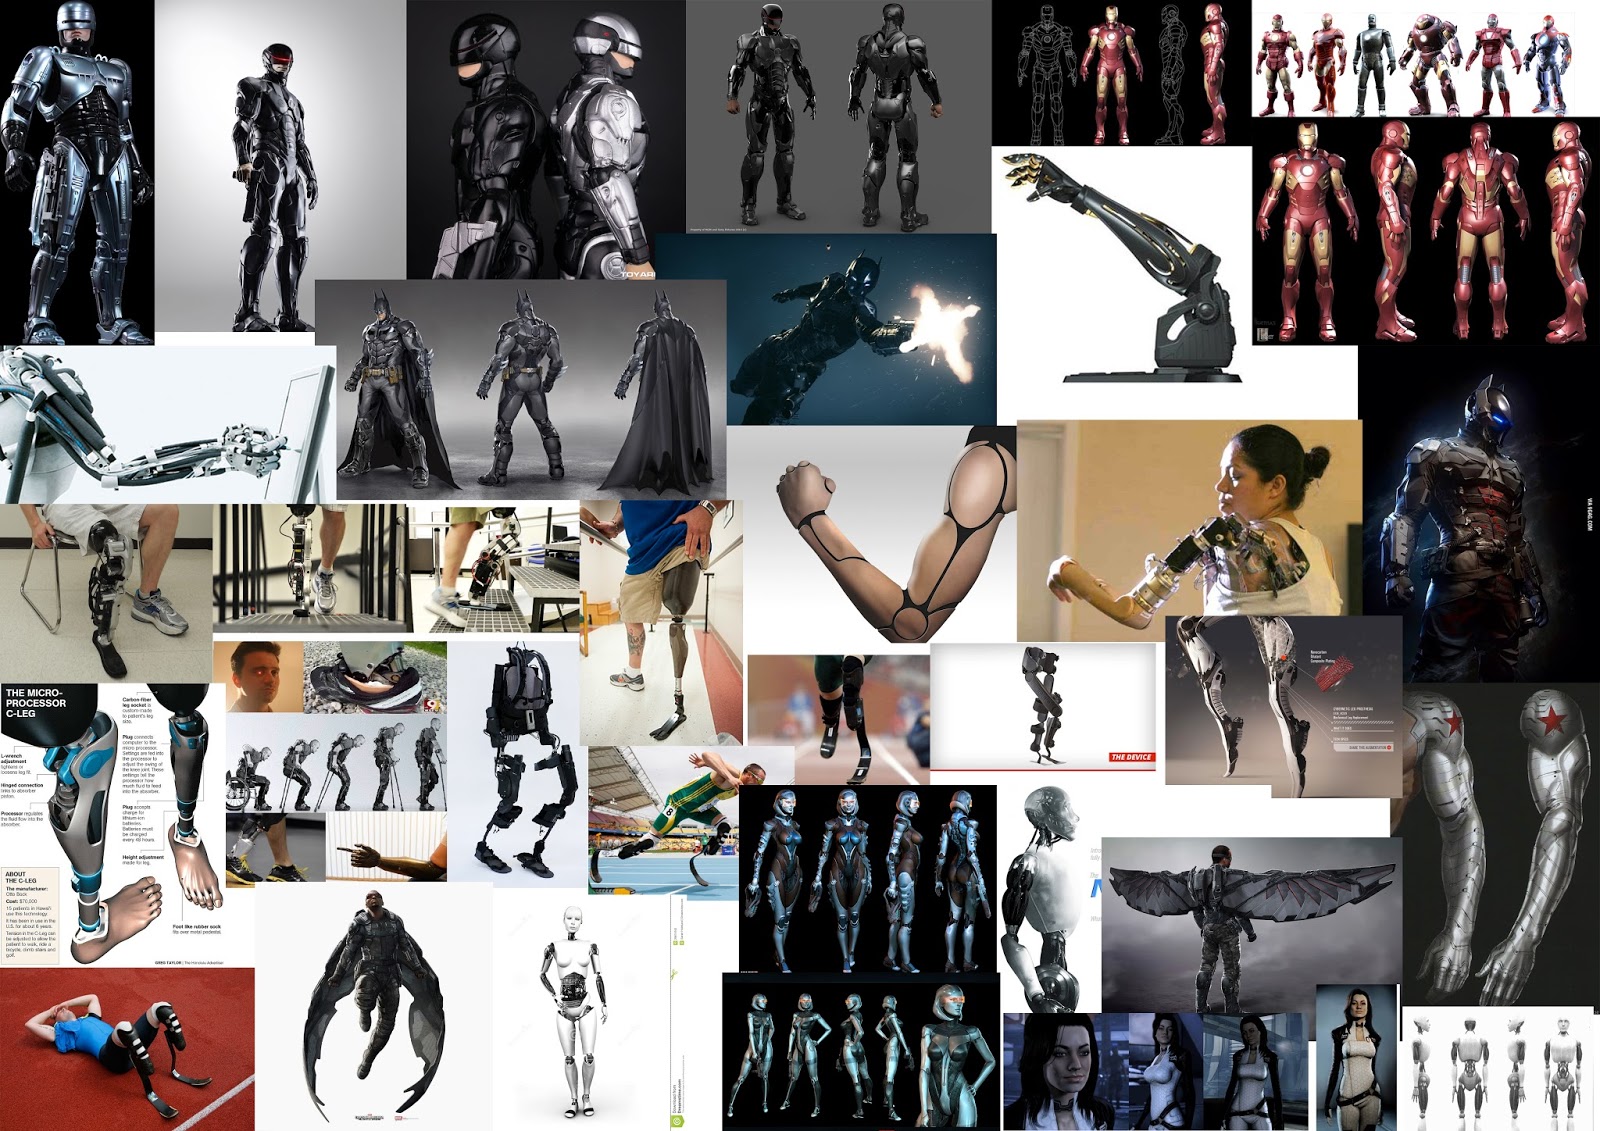
This summer I was given the project to design and create a cyborg character for a sci-fi video game. After reading the brief I decided to do some research and gather images for a moodboard.


I then created silhouettes designs for a cyborg character. I took two pose images from my research one male and one female. I coloured over them with black and then used them as templates. I erase and added paint to create different designs.  I then chose the best three designs and added more detail. 


I decided to develop the female design as I feel I haven't done enough female characters and deigns for my previous projects. I came up with the idea of a cyborg medic and started designing. However I struggled developing the design in photoshop, so I redrew the design in my sketchbook. From their I created another moodboard with my hand drawn pencil design and images of female cyborgs.  
I then started modelling my character within maya. I used a female model images from 3d.sk as I wanted to have realistic proportions. I know my pencil drawing is not anatomically accurate and would cause me problems if I used it as a modelling template.


I started modelling the feet and legs from a cube adding edge loops extrusions.


I then started to model the torso.


Then the arms and breasts.


I then followed a tutorial on youtube in modelling a head. I decided to use the images of celebrity Jennifer Lawrence, as I felt she most suited the character design I was trying to create. I started modelling the eyes, nose and mouth. 


I then expanded out to outline the jaw and cheek line.


I continued to extrude around the side of the head completing the jaw line, cheek and ear.


I then extruded out from the forehead and around the cranium to complete the head.


I then exported the head as an obj file and imported it with the body. I also used the extra edge loops from connecting the head to the body to redo the breasts. The breasts are now in quads.


I then modelled the hands from a cube. I duplicated the finger three times and rescaled them to match each finger length before re-attaching them.


I then exported the hands and imported them into the body scene. After attaching the hands this is the low poly model of my basic female character.


I then added the wings.


I added lights to the scene and rendered the low poly model. I then used the renders to create my pose sheet design of my character in photoshop.